

Zipper pouches come in very handy — whether you’re carrying pencils, using them for craft storage, or even using one as a wallet, they’re always good to have around. But sometimes, the cloth or burlap fabric lacks some extra style. That’s why we’re sharing this super simple, very quick DIY monogrammed pouch project with you.
Materials You’ll Need:
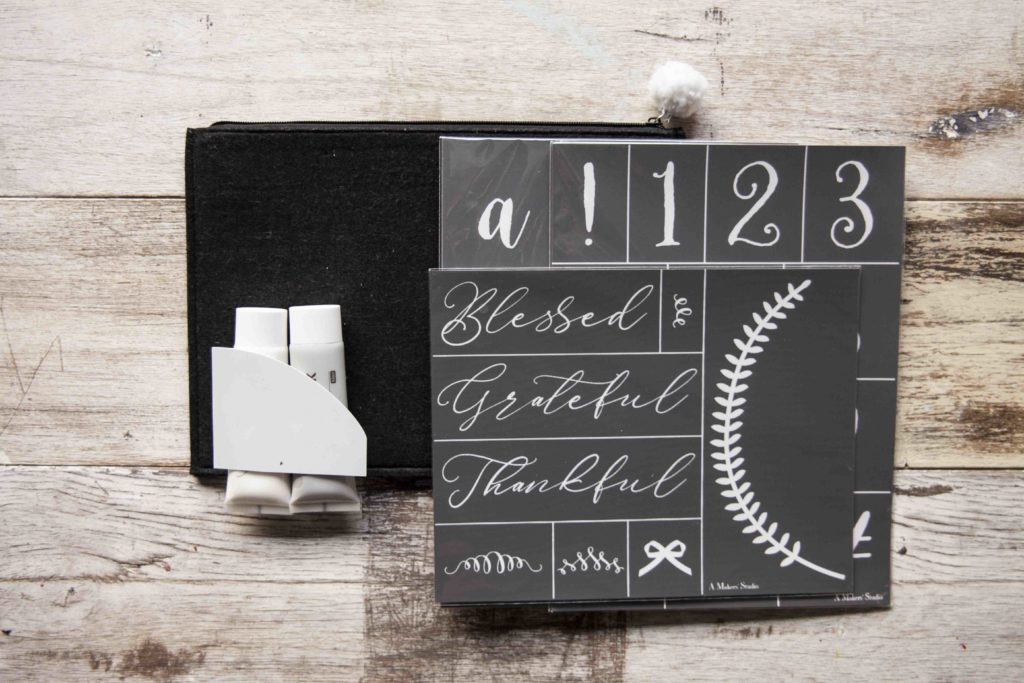
- Blessed Grateful Thankful stencil
- Well I Declare Gel Art Ink
- Blowin Up A Storm Gel Art Ink
- Alphabet 2 Stencil
- Alphabet 3 Stencil
- Spreader
You will also need a cloth pouch that is large enough to hold the wreath part of the Blessed Grateful Thankful stencil.
Monogram Your Pouch in 4 Easy Steps
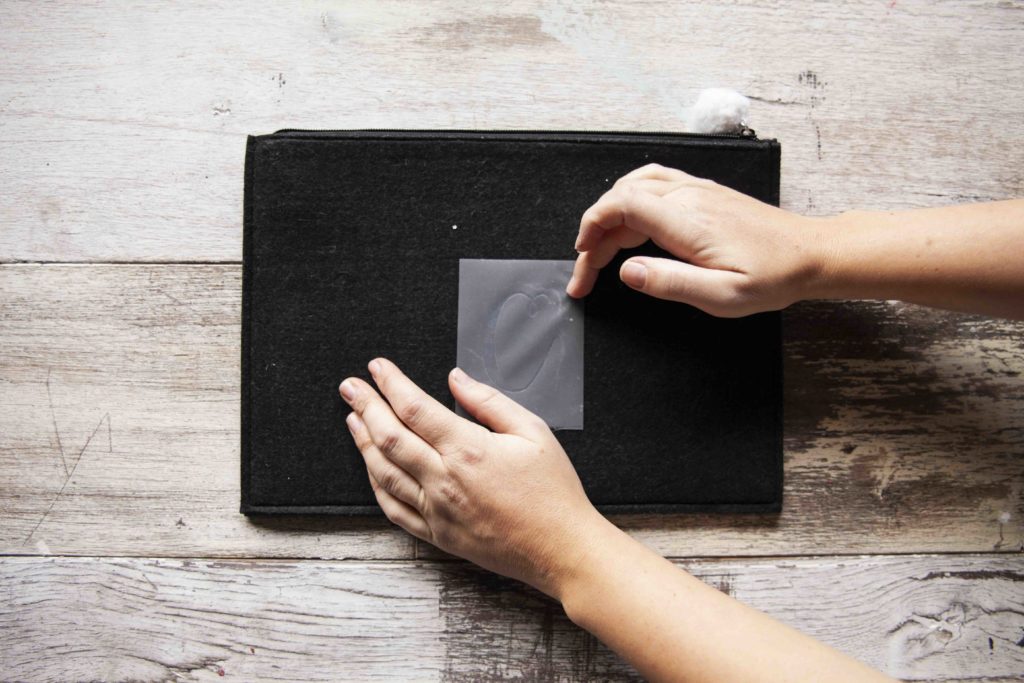
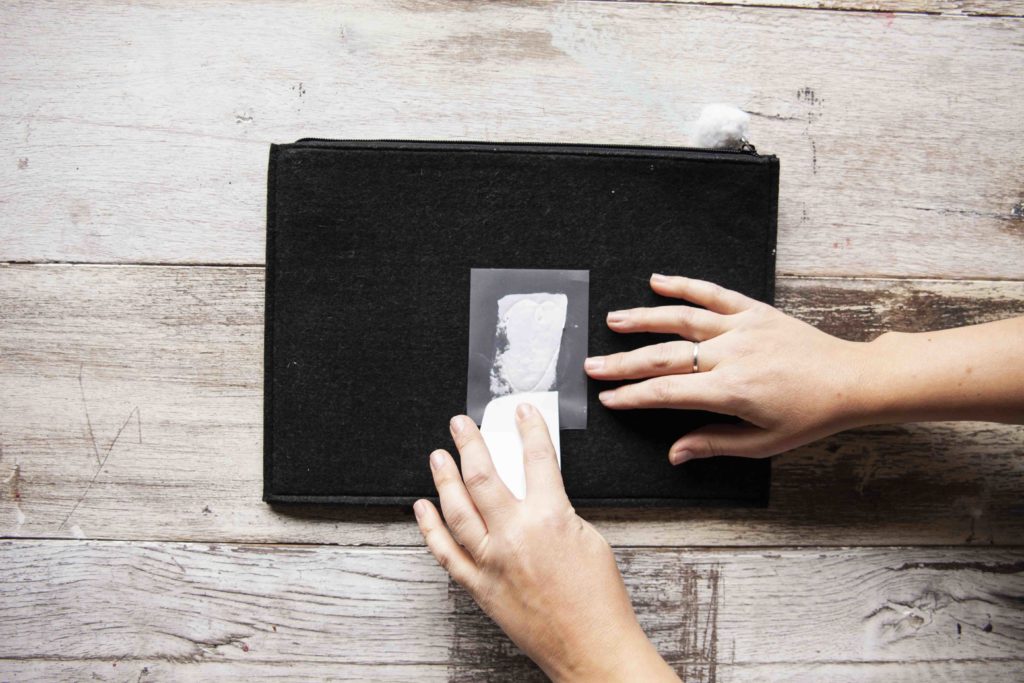
- Lay an upper-class letter (one that fits your first or last name) from the Alphabet 3 stencil on the center of your project. Apply Blowin Up A Storm Gel Art Ink to the stencil, then remove the stencil to wash and lay it flat to dry.
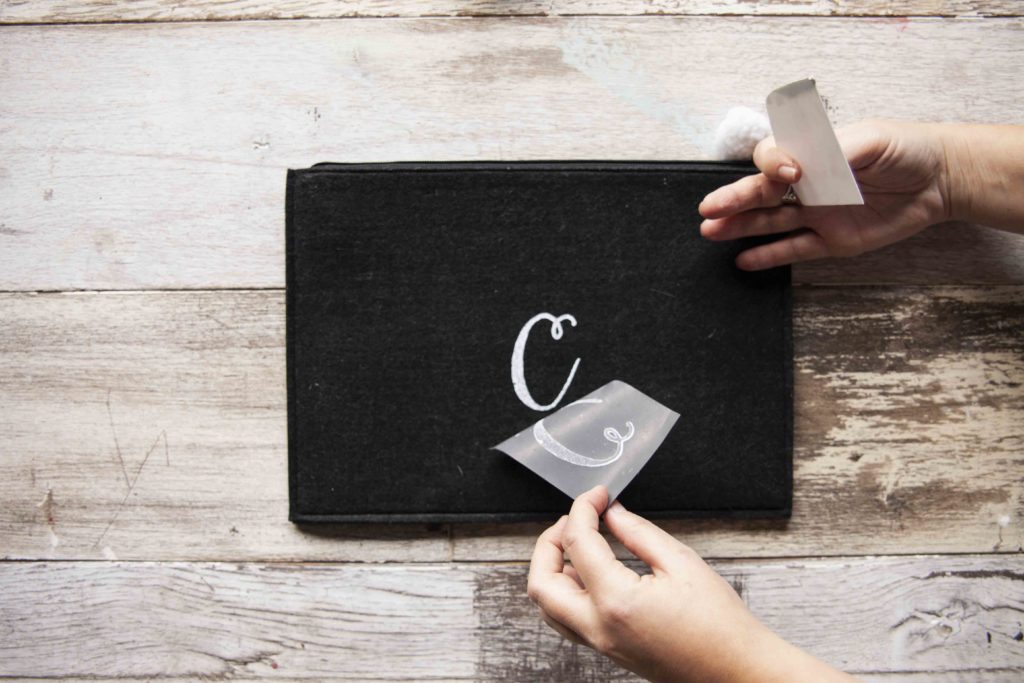
2. Lay lower case letters from the Alphabet 2 stencil to each side of the previous letter to complete monogram, completing your initials. Apply Blowin Up a Storm Gel Art Ink, then remove the stencil to wash and lay it flat to dry.
3. Lay wreath stencil around your monogram and apply the Well I Declare Gel Art Ink. Remove the stencil, wash it, and lay it flat to dry.
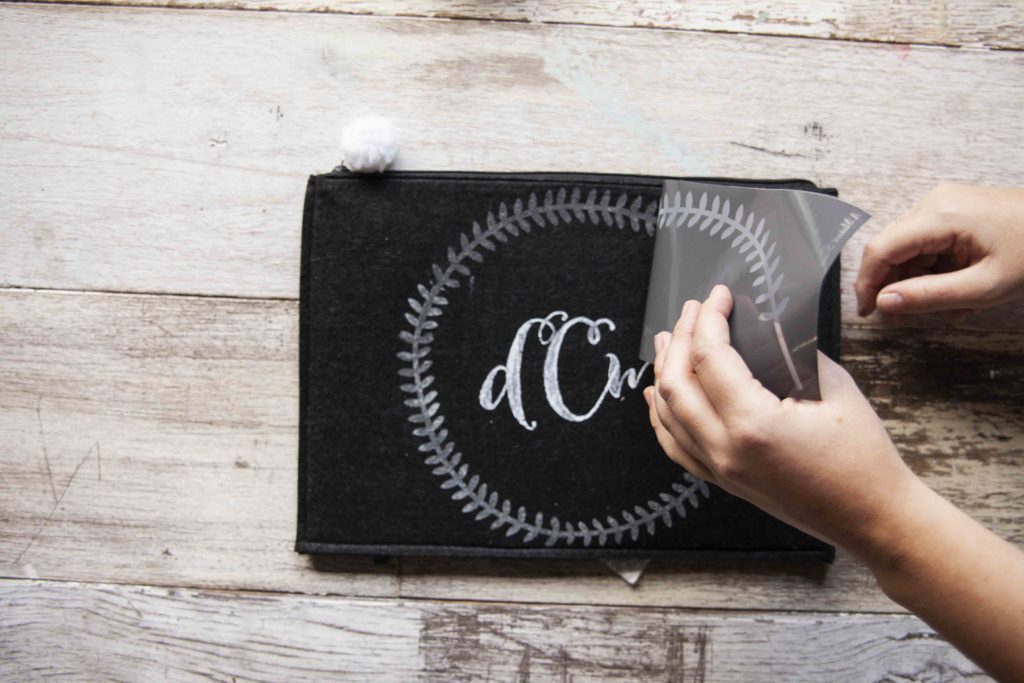
4. Wait until the Gel Art Ink is fully dry, then press with a warm iron over the design to set the ink. Use a clean, lint-free towel to cover the design in case your iron gets too hot.
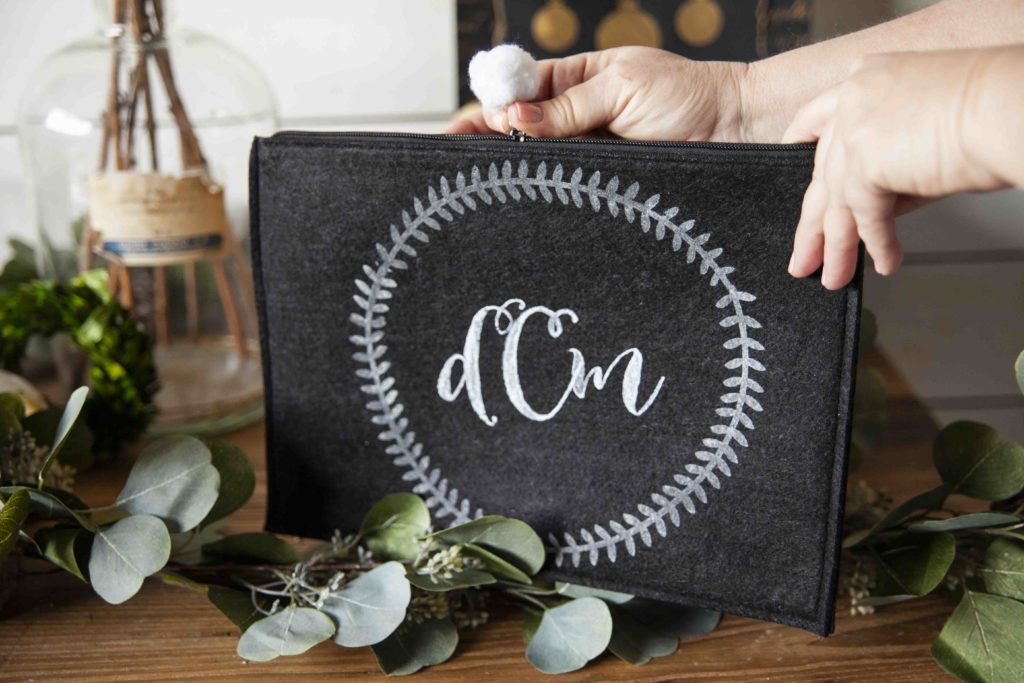
Voila! Now you have a trendy yet functional pouch you can use for whatever you can fit inside it. Of course, these make great gifts and are a super affordable way to provide storage in lunch boxes, tote bags, and even craft closets!
We want to see how you use your monogrammed pouch. Tag @amakersstudio on Instagram and use #enjoythebraggingrights to make sure we (and your community of fellow Makers) can see your stylish new accessory.
