

What better way to say “Happy birthday to you!” than with this adorable DIY Happy Birthday plate! Serve cake, cupcakes, or use as a centerpiece for your next birthday bash, or give as a gift to a loved one.
Materials You’ll Need
Happy Birthday Stencil
Pretty As a Picture Gel Art Ink
Bless His Heart Gel Art Ink
Hey Y’all Gel Art Ink
Spreader
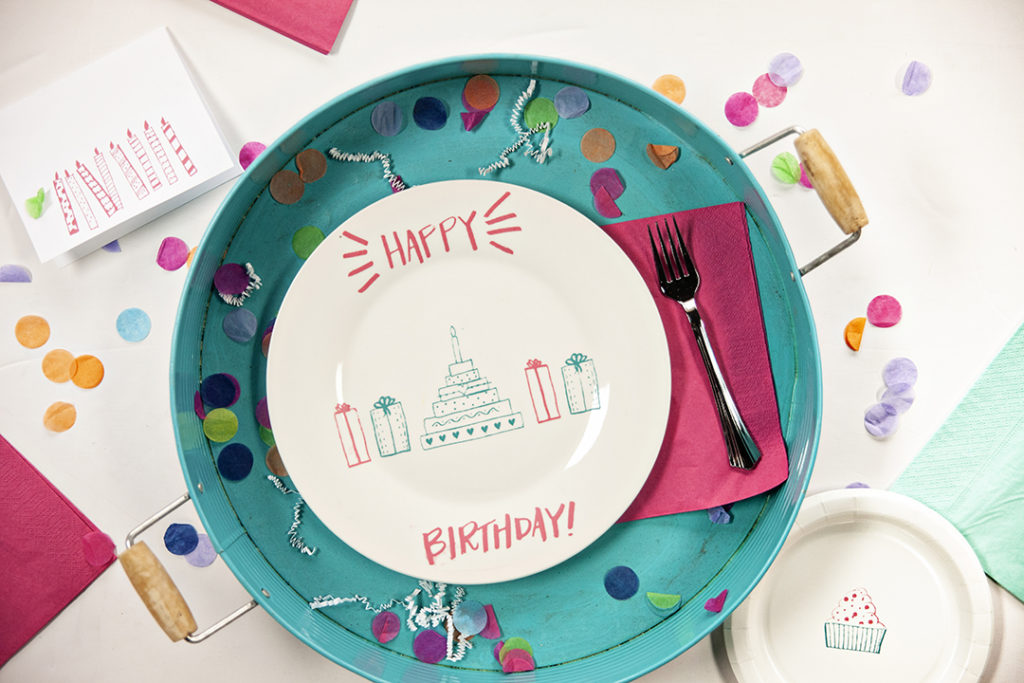
1 white plate (or a few!)
A bowl and stirring stick to mix Gel Art Inks
How to Make Your Happy Birthday Plate
- Lay the cake portion of your stencil on the center of the plate and apply Hey Y’all Gel Art Ink to it with your spreader. Remove the stencil and wash it, then lay it flat to dry.
- Mix Bless His Heart Gel Art Ink with Pretty As a Picture Gel Art Ink to make a magenta color. Apply to the Happy Birthday part of the stencil. Then, remove the stencil, wash it, and lay it flat to dry.
- Lay the gift stencil to each side of the cake. Apply Magenta Gel Art Ink and Hey Y’all to alternate the colors of the gifts. Remove the stencils then wash and lay them flat to dry.
From there, it’s simply a matter of letting your Gel Art Ink dry before use! Also, make sure to wash the plate(s) gently by hand to prevent damage.
Ready to sing Happy Birthday? Tag @amakersstudio on Instagram and use #enjoythebraggingrights to make sure we (and your community of fellow Makers) can see your beautiful birthday decor!
